How to install your HTML email signature in Apple Mail macOS Mojave
Install your HTML email signature in no time! Use our signature installer or follow our step-by-step guides to install your email signature in Apple Mail for macOS Mojave.
Before you start:
- Ensure you've selected the correct installation guide for your macOS.
- Make sure you have your html email signature file or email signature key accessible.
- Open Apple Mail.
Step One
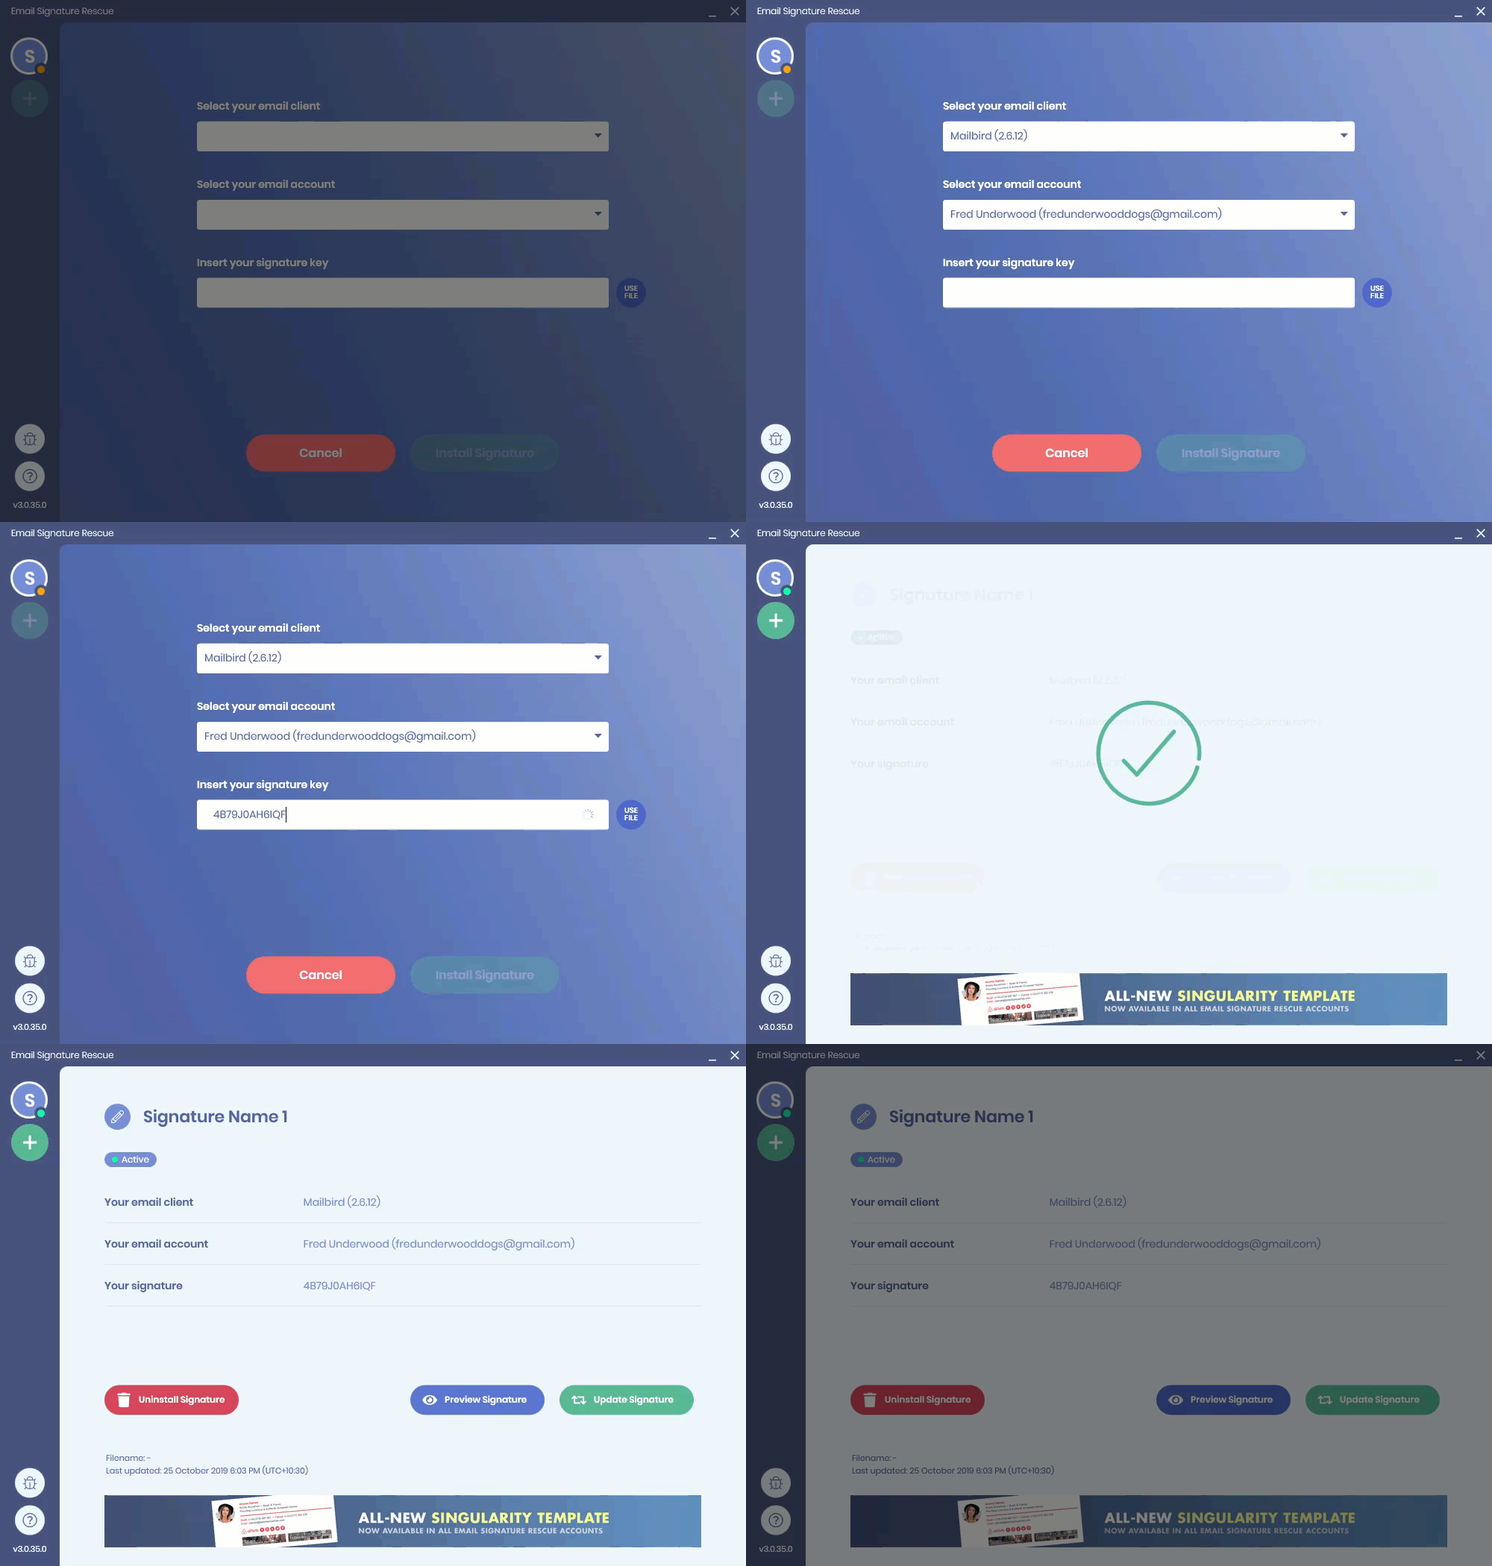
Open the Email Signature Rescue Installer app and click the ( + ) button to add a new signature.
Step Two
Select your Apple Mail email client.
Step Three
Select the email account you want to install your email signature into.
Step Four
Paste your email signature key. If you have HTML file instead of a key, click Use File, then click and select your saved HTML email signature file.
Step Five
Select to insert for replies/forwards if you would like, then click Install Signature.
Step Six
The app will install your email signature into Apple Mail for you, and automatically update it if changes are made to it by the Email Signature Rescue account holder.

Install: Basic Guide (Copy & Paste)
Step One
Open your email signature in Google Chrome or Mozilla Firefox.
If you're logged into your Email Signature Rescue account then you can view your email signature in Full Screen Preview.
Use only the Google Chrome or Mozilla Firefox web browser. Do not use the Safari web browser to copy your email signature from as there is a bug in Safari that will cause your images to stack vertically.
Step Two
Now that your email signature is open in a new window, press Command + A to highlight the signature, then press Command + C to copy the signature.
Do not use your mouse to highlight your signature, use the key command. Using your mouse may result in you missing out on some code which will cause issues with formatting.


Step Three
Open Apple Mail and create a new signature by selecting Mail > Preferences...
Click on the Signatures tab at the top of the window. You should then see your email accounts in the left hand side. Select the email account that you would like your email signature to be associated with and then press the + icon at the bottom to create a new signature.

Step Four
Give your signature a name and make sure the "Always match my default message font" checkbox is NOT checked. Click into the signature text box and delete all of the contents, then press Command + V to paste your email signature in.

The signature won't display the images in the signature preview window which is completely normal, as it will look fine when we send the email. Test that it has been installed correctly by composing a new email instead.
Step Five
Close your Preferences and compose a new email. You should see that your signature is automatically inserted.
If you find that your signature isn't automatically inserting, you will need to go back into your Preferences and set it as your default email signature.

